How To | Removing the amplifier module from K, KW, and KLA loudspeakers for repair or replacement
Learn how to safely remove the amplifier module from K, KW and KLA loudspeakers for repair or replacement.
Procedure
Introduction
If you don’t know which part in the loudspeaker has failed, please contact QSC for further troubleshooting help.
Attention
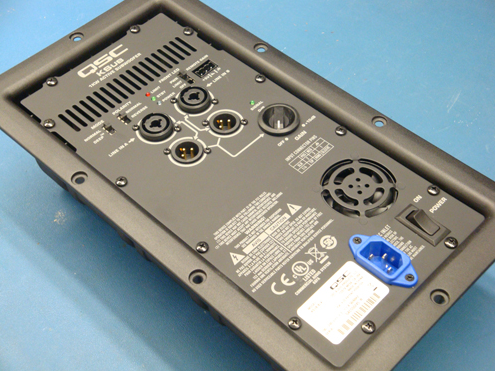
If you are not a QSC Authorized Service Center, do not open the front plate of the amplifier module where all the electronic parts are located. Attempting to repair the amplifier module yourself by opening the front plate will VOID your warranty. Please only remove the amplifier module from the loudspeaker enclosure.
Tools Needed
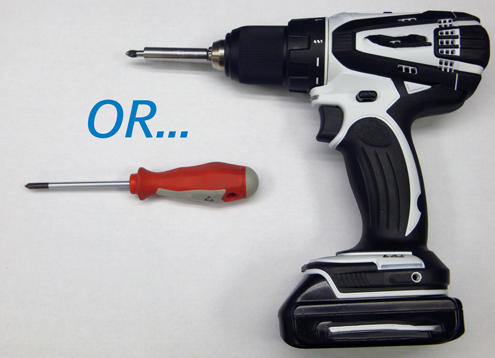
Only 2 tools are needed for this repair:
- Phillips head screwdriver or electric drill with Phillips head extension
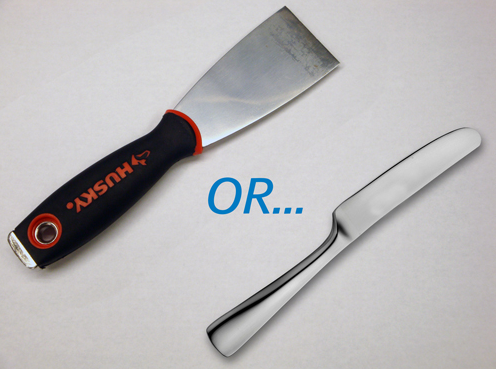
- Putty knife, butter knife, or similar style tool
Removing the Amplifier Module from the Enclosure
1. Unplug the any cords connected to the loudspeaker. You may orient the speaker in any direction that is best for you. You may set the loudspeaker face down on a pad or cushion to protect the grille and finish.
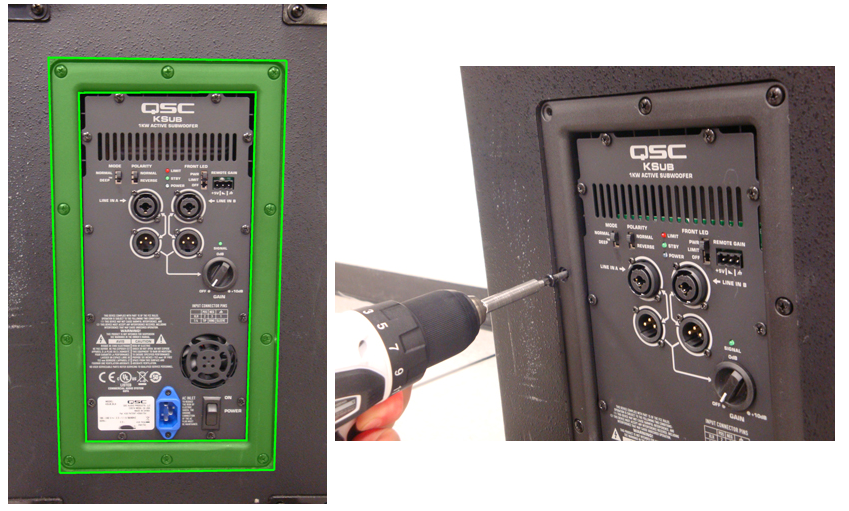
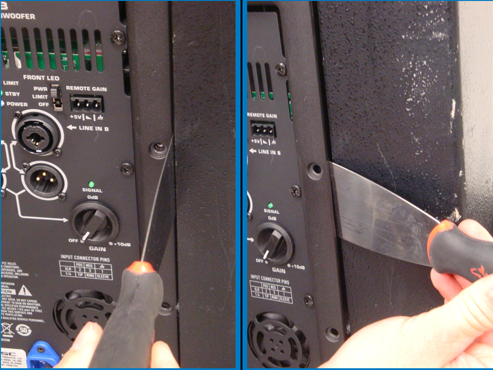
2. Locate the outer-ring of screws that fasten the amplifier module to the enclosure. Remove the 10 screws slowly with a Phillips head screwdriver.
3. Using a putty knife, butter knife, or similar tool, place it in an open gap between the enclosure and amplifier module. Pry the amplifier module outward. You may have to pry in multiple locations to loosen the module from the enclosure.
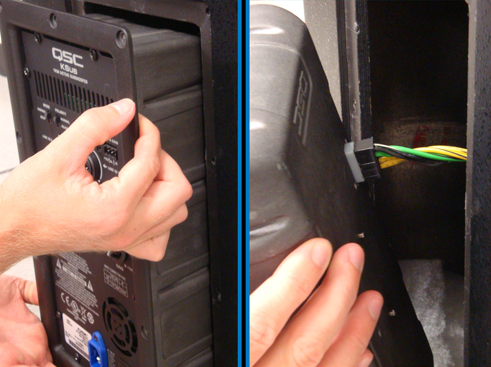
4. Gently and slowly pull the amplifier module out of the enclosure as described in the photo below. DO NOT pull the amplifier module out of the enclosure. There is a multi-pin connector in the rear of the amplifier module.
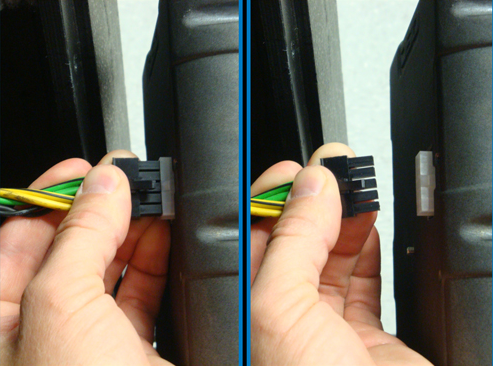
5. Detach the multi-pin connector from the rear of the module.
You are done! Please send this module in if it needs service or change it with a replacement.